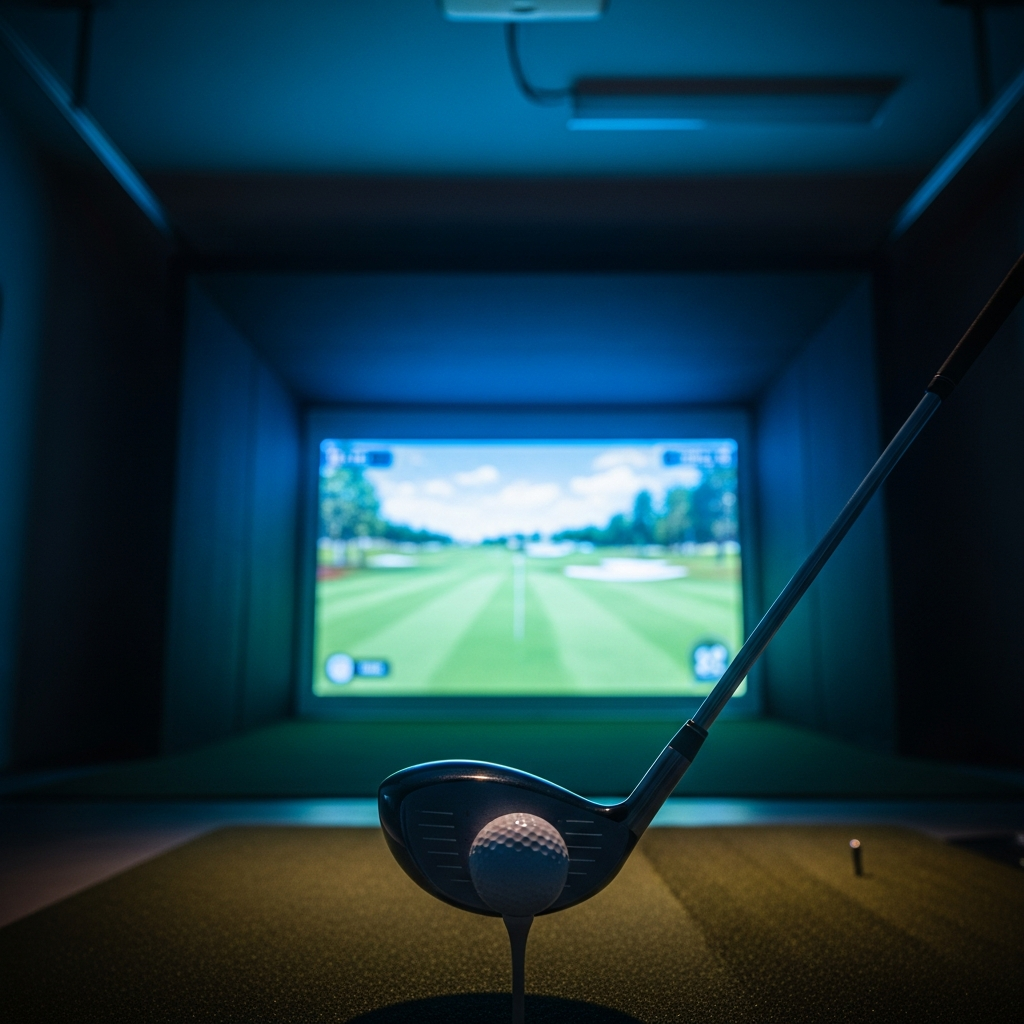
Alright, let's talk about the foundation of your golf simulator: the floor. Forget the fancy launch monitor for a minute, or that 4K projector that’s going to make Augusta National pop. If your feet aren’t happy, or your joints are screaming after 18 holes, then what’s the point?
When I first started building out my 13' wide, 26' deep garage bay, I spent way too much time agonizing over the impact screen and projector. The floor? "Eh, I'll just throw down a hitting mat and call it a day," I thought. Big mistake, folks. Huge. It took me a solid six months of joint pain and a club bouncing off the concrete like a superball before I realized the floor is just as critical as anything else. It affects your comfort, your safety, your club's longevity, and even the "feel" of your entire setup.
So, if you’re standing on concrete or some thin utility carpet thinking it’s good enough, stop. Let’s figure out what’s actually going to save your body and your clubs, without breaking the bank or making your garage look like a kindergarten playroom.
Golf Simulator Flooring Approaches: A Quick Glance
Before we dive deep, here's a look at the main ways people tackle their sim flooring. Think of these as strategies, not specific products, because each strategy has a bunch of options underneath it.
| Flooring Strategy | Pros | Cons | Typical Cost (for ~13'x10' hitting area) | Who It's Best For |
|---|---|---|---|---|
| Full Room Turf & Padding | Seamless look, consistent feel, great shock absorption, sound dampening | Most expensive, installation can be tricky, permanent, harder to clean spills | $1,000 - $3,000+ (turf + padding) | Dedicated sim room, maximum comfort/aesthetics, higher budget |
| Hitting Mat + Surround Tiles | Modular, good shock absorption, easier to replace worn sections, versatile | Visible seams, mat height matching can be finicky, can shift if not properly installed/weighted | $300 - $1,200 (mat + tiles) | Flexible spaces, DIY-friendly, good balance of cost/performance |
| Hitting Mat Only (on concrete/carpet) | Cheapest, simplest, portable | Zero shock absorption for feet, loud, harsh on clubs, potential safety hazard, looks unfinished | $150 - $700 (mat only) | Absolute budget, temporary setup, apartment living (if over carpet) |
| DIY Foam/Rubber Mats | Very affordable, decent shock absorption, easy to install | Can look cheap, not as durable as dedicated turf, potential for mat shifting/unevenness | $100 - $300 (interlocking gym mats/rubber rolls) | Super budget, temporary, experimenting, kids' play area (multi-use) |
My Journey: From Concrete Hell to Turf Heaven
Like I said, I started with the absolute bare minimum. Just a decent hitting mat – a 5'x5' Country Club Elite, which is a great mat, don't get me wrong – placed directly on my concrete garage floor.
Mistake #1: Ignoring the "Walk-Around" Zone I was so focused on hitting off the mat, I totally ignored everything else. Stepping off the mat onto cold, hard concrete between shots was jarring. Mentally, it broke the immersion. Physically, it was just uncomfortable. My knees and lower back started to feel it after an hour or two. Plus, any chips or pitches that didn't hit the screen would bounce off the concrete like a pinball, sometimes right back at me. Not exactly safe.
Mistake #2: Underestimating Sound and Rebound That concrete floor turned my garage into an echo chamber. Every impact, every ball bounce, was amplified. And those shots that went slightly wide or high? They’d hit the concrete and ricochet with alarming speed. I quickly realized my kids (who love to "help" dad) shouldn't be anywhere near this setup.
Mistake #3: The Hitting Mat "Island" A big mat sitting directly on concrete means you’re standing on the mat. Your feet are elevated. For full swings, this isn't terrible – if your mat is firm and stable, your body adjusts. But for chipping and putting, it's a nightmare. The ball is on the mat, but your feet are off it. Or worse, if your stance is half-on, half-off, you're looking at an uneven lie that totally screws with your short game practice. I saw my chipping game go south faster than a hooked drive into a pond.
So, I bit the bullet and started researching.
The Real Solutions: What Actually Works
Based on my experience and what I've seen work for others, there are generally two good approaches for most home simulators.
1. The Seamless Dream: Full Room Turf & Padding
This is what I eventually landed on, at least for the main hitting area and immediate surround. It’s the most professional-looking, offers the best protection, and provides the most consistent feel.
What it is: You lay down a layer of shock-absorbing padding (typically dense foam or recycled rubber) across your entire sim space, or at least the hitting zone. On top of that, you roll out a continuous piece of artificial turf. Your hitting mat is then either cut in and glued flush, or placed on top with the turf built up around it.
Why it works:
- Superior Shock Absorption: This is the big one. The padding underneath drastically reduces the impact on your joints. Your feet feel like they’re walking on a real fairway, not a parking lot. It’s a game-changer for long sessions.
- Consistency: Every step, every stance, is on the same surface. No weird transitions from mat to concrete. Your chipping and putting practice becomes far more realistic.
- Safety: Stray shots land softly, roll predictably, and don’t bounce back at your face with the force of a small meteorite.
- Sound Dampening: The turf and padding absorb a ton of sound, making your sim bay quieter and less of an annoyance for anyone else in the house.
- Aesthetics: Let's be honest, it just looks like a dedicated golf space. Makes the investment feel even more worthwhile.
My Setup & Costs: For my 13'x10' hitting zone (which extends a few feet past the screen on either side, and about 8 feet forward from the screen), I went with:
- Underlayment: 1/2" thick interlocking foam gym mats. I bought a bulk pack of 2'x2' tiles. They cost me about $200 for 130 sq ft. I laid these down directly on the concrete. They're dense enough to provide good cushion but firm enough not to feel squishy.
- Turf: I opted for a relatively inexpensive but dense artificial turf from a local supplier. It's a low-pile, non-infill turf, which is crucial for a sim. You don't want sand infill flying everywhere. I bought a 13'x10' section. This ran me about $500 ($3.85/sq ft).
- Hitting Mat: I kept my 5'x5' Country Club Elite mat (around $450 new). I laid the foam padding, then the turf. Then, I cut out a perfect 5'x5' square from the turf and a slightly smaller square from the foam underneath, so the CCE mat could drop in and sit perfectly flush with the surrounding turf. This takes patience and a good utility knife. You can also just lay the mat on top of the turf if you don't mind the slight elevation, but flush is best for short game.
- Adhesive/Tape: I used outdoor carpet tape to secure the turf edges to the concrete and to each other, and a little construction adhesive to really lock the hitting mat in place. $50-75.
Total cost for my seamless setup (excluding the original mat): ~$800. If I had to buy the mat too, add another $450.
Pro-Tip: When buying turf, look for "putting green turf" or "golf fringe turf." Avoid landscape turf with long, shaggy blades or visible infill. You want something dense, short, and firm. SYNLawn offers some great options, but local suppliers can often beat their prices for similar quality.
2. The Modular Approach: Hitting Mat + Surround Tiles
This is a fantastic option if you need more flexibility, want to save some money, or have a multi-use space.
What it is: You choose a dedicated, high-quality hitting mat. Then, you surround it with interlocking foam, rubber, or turf tiles that are the same height as your mat.
Why it works:
- Cost-Effective: Often cheaper than full rolls of turf, especially for smaller areas.
- DIY-Friendly: Tiles are super easy to lay down and cut to fit. No need for heavy rolls of turf.
- Replaceable: If one section gets worn or damaged (e.g., from an errant club drop), you can just replace that tile, not the whole floor.
- Portable/Temporary: Easy to remove if you need to clear the space for other activities.
My Initial Tile Attempt (and learning): Before the full turf, I tried surrounding my CCE mat with cheap 1/2" interlocking foam gym tiles. It was better than concrete, but not perfect.
Mistake #4: Uneven Mat Height My CCE mat is about 1.5" thick. The cheap gym tiles were 1/2". This meant my hitting mat was an inch higher than the surrounding floor. Horrible for short game, and just felt off.
The Fix (if you go this route): You have to match the mat height. This means either:
- Buying a hitting mat specifically designed to be flush with common tiles: Some mats come with built-in or optional base layers to achieve this.
- Building up the tile area: Layer multiple foam tiles under the surround area until it's flush with your mat. This can make the surround feel a bit bouncy, so use dense tiles.
- Cutting a hole for the mat: Similar to my full turf method, but with tiles. You'd lay down your base layer of tiles, then cut a hole for your hitting mat to drop into, adding more layers under the mat if needed to bring it flush.
Recommended Tiles:
- Dense Foam Tiles: Look for "heavy duty" or "commercial grade" interlocking foam mats. They're firmer and more durable than the cheap stuff. Brands like Rubber-Cal or IncStores offer good options. Expect to pay $2-4 per sq ft.
- Rubber Tiles: These are heavier, more durable, and offer excellent shock absorption. Great for multi-use gym/sim spaces. They're also denser, so matching mat height might be easier. But they can be pricier, sometimes $3-6 per sq ft.
- Turf Tiles: These are foam or rubber tiles with a layer of artificial turf on top. They give the look of turf with the modularity of tiles. Pricey, often $5-10 per sq ft, but can look great.
Example Cost:
- A 5'x5' Fiberbuilt hitting mat (around $600-800)
- Surrounding area of 10'x10' minus the mat = 75 sq ft.
- 75 sq ft of good quality dense foam tiles @ $3/sq ft = $225.
- Total: $825 - $1025. Very competitive with the full turf approach, especially if you have a smaller hitting zone.
Who Should NOT Buy This (Mack's Anti-Recommendations)
I'm all about saving money, but there are some areas where cutting corners just isn't worth it. Flooring is one of them.
- DON'T buy thin, cheap hitting mats ($50-$100) and put them on concrete.
- Why not: You'll hurt your wrists, elbows, and shoulders. Your clubs will take a beating. The ball will bounce off the mat face with weird energy. These mats are for chipping in the backyard, not full swings into an impact screen. Spend at least $150-200 on a decent 4'x5' or 5'x5' mat if you're serious.
- DON'T buy super soft, low-density foam tiles as your primary padding.
- Why not: They compress too much, offering an unstable base for your swing. They'll wear out quickly, and your feet will still feel too much impact. They're fine for light foot traffic areas or as a very thin underlayment